 |
Products |
 |
|
|
|
 |
Quick Find |
 |
|
 |
Information |
 |
|
 |
| 0 items |
 |
|
|
 |
Tell A Friend |
 |
|
|
|
|
| one π speaker Reviews |
 |
|
 |
| Product: one π speaker |

|
| From: Ross Whitney |
| Date: Friday 11 February, 2005 |
|
| Review: |
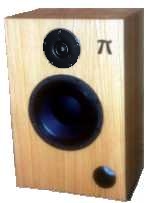
I've owned a Yamaha RX-V640 AV receiver for over a year, and for most of that time I've been running it with a pair of Tannoy PBM-8 studio monitors. I also have a vintage QSC model 5.1 power amp, rated 80 watts per channel into eight ohms, and 120 watts per channel into four ohms. The line level subwoofer output on the Yamaha receiver feeds both inputs of the QSC amp, and the QSC amp feeds a pair of Rage 12" subwoofers from the subwoofers division of Audio Concepts Inc. The homebuilt sub cabinets are two cubic feet gross internal volume, sealed, and loosely stuffed with medium density spun polyester fiber matting. Primary sources are the line level outputs from a Bell ExpressVu satellite receiver, and the optical output from a budget DVD/CD player.
I hated to see 340 Watts of Japanese-engineered, Malaysian-built power going to waste, so I decided to look into building six identical systems to replace the two Tannoys. There are a lot of designs out there, but I was drawn to Pi Speakers for a number of reasons. I have read a lot about speaker system design over the years, and Wayne's knowledge of the physics and engineering aspects strike me as (pardon the pun) more than sound. His willingness to share the design details of the finished systems he sells impressed me. The greatest appeal for me was his ongoing responsiveness and encouragement, both by email and on the forum here.
I am no woodworker. I am fortunate to have a neighbour who is as passionate about power tools as I am about music. My neighbour helped me build my sub boxes, in return for a large circle jig from Jasper Audio. This time around, I called him and asked if he would help me again in exchange for one of the smaller Jasper jigs. He readily agreed. His contribution this time around was cutting rebates and through holes for the drivers and the terminal cups, and through holes for the port tubes. I had my local lumber yard cut all the 5/8" MDF panels to size, and I assembled the boxes on my kitchen counter using butt joints, #8 particle board screws, and yellow carpenter's glue. The boxes are caulked with silicone sealant, and lined on three sides with 3" R12 fiberglass insulation. The baffles are removable, and sealed with 3/16" X 1" heavy duty truck cap foam tape weatherstripping.
Immediately after we cut the holes for the port tubes, I realized that the 2" mailing tube I had purchased was 2" inside diameter, reinforcing the woodworker's adage to "Measure twice, cut once." Determined to stick to the proven design, I managed to find a shop in the next county that stocked 63 mm PVC pipe. Since the internal diameter of the PVC is roughly 2" as opposed to the 2-3/8" in the original design, I sought Wayne's advice and subsequently cut the port tubes to 3" in order to maintain the specified tuning frequency.
As I type this, the speakers are in their places, one in each corner of my living room, one on top of the entertainment unit, and one on a window ledge directly behind my spot on the couch. The corner speakers are on 27" stands, so the space between the LF and HF drivers is at ear level. The stands were homebuilt as well, with leftover rectangles of MDF for the bases and platforms, and sand-filled 4' PVC tubes serving as uprights. The MDF is coated with the same black chalkboard paint that I used on the cabinets, and the uprights are covered with oak grain contact paper.
As I have posted in the forum here, the best adjective I can use to describe the one Pi's is "IMPRESSIVE". I was comforted knowing that there was a recommended HF upgrade from Vifa, but since my local driver source still had some of the CTS piezos in stock, I decided to go with them. "Spitty" has been used in the past to describe some of the Motorola-designed piezo tweeters, but that adjective does not apply in this case. To my ears, these speakers are very well balanced. When I'm listening to music, I often run just the front left and front right speakers. The bass response is impressive, and depending on the program material, I often choose to leave the subwoofer amp off.
I'm entirely satisfied with my decision to build a set of one Pi speakers, and I'm sure that my family and I will enjoy them for years to come. Whether you source out the components yourself, buy the kits from Wayne, or buy the finished systems, which are very professionally done, I offer my opinion that you will have no regrets. Thank you Wayne, for sharing your wisdom and your designs! |
Rating:  [5 of 5 Stars!] [5 of 5 Stars!] |
|
|
|


